Free Advertising by FreeAdvertisingNetwork.org
Showing posts with label Blog Gadgets. Show all posts

29 Nov 2013

Adding Blogger Contact form in your Blogger Blog

Leave a Comment
Contact form in your Blog
Blogger have given you the service through which you can add Contact form in your any page right from your Layout in Dashboard. Yes, I can hear your scream, Where the hell is that if I have check all the gadgets in Layout menu.

Well, Why don't you go and Check More Gadgets column in the list of Blogger Gadgets. Yes, Exactly there is your Official Blogger Contact form which you can use in your blogger blog without knowing any HTML game.

I know its kind of Old Looking but  I am promising you soon I am coming with a Modified Version of Contact form which will dress up this Contact form. Yes, For That Modified Form You have to install this Official Contact Form. So, Ready Let's see what steps you have to follow in order to Add Contact form in Your Blogger Blog.


1. Go to Your Blogger Dashboard>> Layout>> and click on add gadget ( Screenshot Below) 

Add Gadget


2. Click on More Gadget and click on Plus Button.

Add Contact form


3. Rename Title as you want Click on Save & you are done…!! :)

Configure your Contact form

See, Its Done... :) and You are wasting your valuable time in search 'How to add Contact form in Blogger Blog' well, it's okay, DO forget to tell me how is it?? and Do share if it helped you.

Thank you!!!

Read More...

22 Aug 2013

Add New Animated Flying Twitter Bird Gadget for Blogger

Leave a Comment
Animated Flying Twitter Bird
Guest Post - In this post Dasari Harish will show you how to have a stunning Twitter bird Fly around your blog pages, landing randomly in view of visitors to Share your posts and Follow you.

"Twitter", is one of the most popular Social networking sites in the world among Bloggers to promote their blogs.There are a number of twitter widgets, scripts and plugins available to integrate Twitter with your blog.Most of the icons, buttons or badges are stationary or a fixed floating Twitter gadgets.Now here i have a very cool unique Blogger Twitter widget, an actual Animated flying Twitter Bird that flies around your blog.

This Plugin is java script based and it will display an animated Twitter bird that settles on different places of your blogs visible area. If a you scroll the page, the bird will fly towards the visible part and settle in a new place and it takes random paths for each flight.When you place the cursor over the Twitter Bird "tweet this" and "follow me" links appear,through this the visitor can tweet the article or follow you.

Add The Flying Twitter Bird To Your Blog


There are Two types here is am giving.You can have the Bird on every page of your blog or just on the post pages..

1. Twitter Bird with tweet text has Post title and URL for all post pages Only.
2. Twitter Bird with tweet text has Current Page title and URL for all Blog pages.

Add Flying Twitter Bird To Post Pages Only

1. Go to Your Blogger Dashboard Click > Design > Edit Html

Design Edit Html Blogger

Step 2. Find the following piece of code in your blogs Html : (Click Ctrl and F for a search bar to help find the code )

</body>

3. Copy and paste the following ocde directly Below / After </body>

<b:if cond='data:blog.pageType == &quot;item&quot;'>
<!-- Twitter Bird Widget for Blogger by Way2blogging.org -->
<script type="text/javascript" src="http://bloggerblogwidgets.googlecode.com/files/way2blogging.org-tripleflap.js">
</script>
<script type="text/javascript">
var twitterAccount = &quot;Your Twitter User Name Here!&quot;;
var tweetThisText = &quot; <data:blog.pageTitle/>: <data:blog.url/> &quot;;
tripleflapInit();
</script>
<span style="font-size:11px;position:absolute;"><a title='Blogger Widget by Way2blogging.Org' href="http://www.way2blogging.org" target='_blank'><img border='0' src='http://img1.blogblog.com/img/blank.gif'/></a></span><a href="http://bloggingsection.blogspot.com" target="_blank">Twitter Bird Gadget</a>
<!-- Twitter Bird Widget for Blogger by Way2blogging.org -->
</b:if>


Important Note:-
Replace Your Twitter User Name Here! with your twitter user name.You add just the username not the entire URL of your Twitter profile.For example twitter.com/mromkarsingh , paulcrowepro is the username.


4. Save Your template And Check Out Your Twitter Bird.

Final Words

I Hope you Liked this post and don't forget to share this article with your network. :).Thanks to Omkar singh for inviting me to write a Guest post on his Great Blog.


Dasari Harish
About the Guest Author:
Dasari Harish is the Author of Way2Blogging.org, were he provides Blogger Gadgets and Tutorials. You can also follow Dasari Harish On Twitter.
Read More...

25 Apr 2013

Add a Pinterest Mouseover Button to Your Blog Images

Leave a Comment


Have you noticed this trend on blogs lately? This is a new feature I’ve seen popping up everywhere. When you put your mouse over an image on the blog, a Pinterest logo pops up prompting you to “Pin” the image. At first I wasn’t sure if I loved this feature or hated it. But after giving it a chance, I’ve decided I love it. :) I don’t know about you guys, but most of the blogs I visit have SO many gorgeous photos to pin. It seems like every photo is “pin-worthy!” Sometimes I have a hard time choosing which image from a post I want for my Pin board, and by the time I finally make the decision, hit the “Pin it” bookmarklet in my toolbar at the top of the screen, and the Pinterest pop-up screen appears with all the tiny square thumbnails, I’ve forgotten which image it was that I wanted to pin — or worse, I can’t tell which image I wanted to pin because the thumbnails are too small! So this is a feature I’ve grown to immensely appreciate, since now I am able to simply pin the image I want right there from the blog post while I’m reading.
If you’ve got a blog and want to add this feature to your photos, here’s how you do it.

FOR WORDPRESS


If you’ve got a self-hosted WordPress blog, you can use the Pinterest Pin It Button For Images plugin.

  1. Simply download the zip file from the above link, go to your WordPress Dashboard, click Plugins > Add New > Upload and upload the zip file.
  2. Activate the plugin, then from your WordPress Dashboard, go to Settings > Pinterest Pin It.
  3. Under the heading Show “Pin It” button on following pages, click All Pages. Click Save.

This plugin comes with the default “Pin It” button as seen in the image above. If you like it, that’s it!

You’re done! :)

You now have a Pin-It button that will appear when a reader puts their mouse over any image on your blog.
If consider yourself tech-savvy and you’re up for a little bit more of a challenge, you can also choose to use your own button style in just a few easy steps.

Customizing Your Button

You can make your own personalized button, or here is a link with some gorgeous, free Pinterest buttons. You’ll probably want to make sure that the button you choose has a transparent background and is saved as a PNG file, otherwise, if it has a background, it will be white on your image. Once you’ve chosen your image, here’s what you do:
  • Open the pinterest-pin-it-button-for-images.zip file you downloaded.
  • Drag and drop the new Pin It button into the pinterest-pin-it-button-for-images folder.
  • Open the ppibfi_pinterest.css file in Notepad or Text Edit and find the following code (it’s right there at the top, very easy to find! :))
.pibfi_pinterest .xc_pin {

width: 80px; height: 50px/* Please note that the button is 80px x 50px. If you use a different size button, change this */

background-image: url('ppibfi_button.png'); background-repeat: none; /* This is the buttons image. Image can be found in the plugin folder */
It’s easy going from here. As the instructions say, if your button is a different size, change the code to your button’s width and height. Then change where it says ppibfi_button.png to the name and filetype of your image. Save the file.
If you’d like your button to be in a different position, look just underneath the previously mentioned code and find where it says
top: 5px;
margin-left: -1px;
Change these numbers to shift your button to a different position. I changed mine to top: 15px; margin-left: -15px;. You can also change top to bottom to have the button appear in the bottom corner.
Once you’re done editing, save the ppibfi_pinterest.css file, then zip up the pinterest-pin-it-button-for-images folder.
  • On a Mac, you can just right-click on the folder and choose Compress.
  • On Windows, I believe you can right-click on the folder and select Add to Zip, although I haven’t used a Windows computer in a good seven years, so my information might be a bit outdated. :)
Then follow the previously mentioned steps to install the plugin to WordPress, starting with Step 1.
That’s it! You should now have your own customized Pin It button that will appear whenever anyone puts their mouse over an image on your blog. :)
NOTE: If that all sounded like Greek, you can always just use the button that comes with the plugin. It looks great! :)


My Thoughts On This Plugin


  • What I really like about this plugin is that if the image is a link to another page, you can still click on the image to get to the link. For example, you can click on any photo on my blog to see the camera, lens, and settings used to take that photo. Also, when I share links or lists and use an image, I will link the image as well so all you have to do is click on the image to get to the page. This plugin does not interfere with that. It will only Pin the image if you click on the actual Pinterest button in the corner of the image. Click anywhere else on the image to be taken to the link.
  • When someone pins an image from your blog using this plugin, it will automatically fill in the description box with the title of your post. This can be a good and bad thing. Some bloggers (myself included) prefer to write their own description for each image, which may include hashtags or a link back to their blog. This plugin overwrites any custom description you may give your images and replaces it with simply the title of the blog post. So that may not be ideal. However, for older blog posts where you may not have set up a custom description (which is probably the majority of your blog posts, if you’ve been blogging for any length of time) this can be a great thing. It will now automatically fill in the description box with your post title. So as long as you have descriptive post titles, you’re golden!


  • FOR BLOGSPOT / BLOGGER


    If you’ve got a Blogspot blog, there’s a super-easy tutorial to get this working for you as well.

    1. Follow this tutorial at BloggerSentral.com: Pinterest Pin It Button On Image Hover.


    So what do you do if you’re not a blogger and a blog you love doesn’t have this feature?


    Great news! If you love this feature but visit a blog that doesn’t have it, there’s an easy solution. If you use Firefox or Chrome, you can install a plugin where all you have to do is Right-Click on any image to Pin it.


    As you can see in the image above, the Chrome plugin automatically fills in the description box with the post title and the name of the blog. I love this! With the Firefox plugin, the description box is blank. Boo!
    If you use Safari or Internet Explorer, I’m afraid I couldn’t find a plugin for this trick. If you know of one, please feel free to leave it in the comments! However, you can always install the Pin It toolbar button at the top of your screen.

    So What Do You Think...
     I’ve installed this plugin so you guys can see it working on my site. Feel free to pin any image from this post! I haven’t decided if I’m going to keep it yet though. What do you guys think of Pin It buttons that pop-up when you put your mouse over an image? Is it annoying and “in your face” by saying “Pin me! Pin me!”? Or is it a helpful tool that makes pinning quick and easy? What are your thoughts?


    NOTE: This Article is been Republished by me. from the website Name Kevin And Amada. To Go to the Original Article Please Click Here


    Read More...

    23 Apr 2013

    Guest Author Box: Show Guest Author Info Below Blogger Posts

    Leave a Comment
    Guest Author Box
    Due to lack of time blog authors often have to rely on Guest posters. In return we offer them with quality back links and advertisement. In order to better serve them it is important to display some info about them in a polite and attractive manner. This will encourage more and more people to write quality articles for you. We are very selective in accepting tutorials written by our readers but once the tutorial qualifies we publish their post in the best manner possible. See the example below which shows one of Blogging Section's Guest Author’s info.


    Guest Author Box: Show Guest Author Info Below Blogger Posts

    To create this type of attractive box for your guest authors you would need to play with some  delicious CSS and HTML . So then Lets jump straight to the main part!


    How To Create Customize Guest Author Info Box


    1. Go To Blogger > Design > Edit HTML
    2. Back up your template
    3. Search for ]]></b:skin>
    4. Just above it paste the code below,
    /*----------Guest Poster --------*/
    .mbt-gp img {
    margin:0;
    border:0;
    }
    .mbt-gp-about {
    font-size:12px;
    margin:0 auto;
    padding:3px;
    width:580px;
    background:#edf6ff;
    border:#9ecfff dotted 1px;
    min-height:130px;
    }
    .mbt-gp {
    padding-top:10px;
    margin:0;
    font-size:12px;
    float:left;
    width:17%;
    text-align:center;
    border-right:#93C0F9 solid 1px;
    }
    .mbt-gp-text {
    float:right;
    width: 80%;
    padding:5px;
    text-align:left;
    font:12px arial,sans-serif;
    text-align:justify;
    margin:0;
    padding:0;
    }


       5.    Save your template and jump to the next part of the tutorial.


    How To Add Box Below Post

    Now whenever you publish a Guest post at your blog, simply switch to the Edit HTML Mode of your Blogger Editor. And drag to the bottom of the HTML codes and just at the end add the code below,

    <div class="mbt-gp-about"> 
      <div class="mbt-gp"><img src="GUEST-AUTHOR-IMAGE-LINK" width="80" height="70" /> GUEST-AUTHOR-NAME </div> 
      <div class="mbt-gp-text"> 
        <p><strong>About the Guest Author:</strong> 
          <br />ADD-DESCRIPTION-ABOUT-AUTHOR-INFO-HERE </p> 
      </div> 
    </div>


    See the screenshot below to know better where to add the code,
    Guest Author Box: Show Guest Author Info Below Blogger Posts

    Make sure you replace the bolded text with proper details. The image size would fit perfectly if it is 200px by 125px.

    You will have to add just the second code for every guest post that you publish. Once you understand on how to do it then doing it again and again would become more like a fun. I just hope you find it useful and worth trying. Take care buddies. :)

    Read More...

    3 Apr 2013

    Smooth Jquery Featured Post Slideshow For Blogger

    Leave a Comment
    This tutorial will shows you how to add featured content slideshow to show your featured post to your readers.This slideshow is very easy to setup and can easily manage width and height to match your template.Not only that you can change the speed of this slideshow easily.Default width is 550px and Default height is 200px.I think you will love this slideshow.


    Smooth Jquery Featured Post Slideshow for Blogger

    1.Login to your blogger dashboard--> layout- -> Edit HTML
    2.Scroll down to where you see </head> tag .
    3.Copy below code and paste it just before the </head> tag .


    script src='http://ajax.googleapis.com/ajax/libs/jquery/1.9.0/jquery.min.js' type='text/javascript'></script>
    <script type='text/javascript'>
    //<![CDATA[
    
    /* ------------------------------------------------------------------------
     s3Slider
    
     Developped By: Boban KariÃ…¡ik -> http://www.serie3.info/
     CSS Help: Mészáros Róbert -> http://www.perspectived.com/
     Version: 1.0
    
     Copyright: Feel free to redistribute the script/modify it, as
          long as you leave my infos at the top.
    -------------------------------------------------------------------------- */
    
    (function($){
    
    $.fn.s3Slider = function(vars) {
    
     var element     = this;
     var timeOut     = (vars.timeOut != undefined) ? vars.timeOut : 4000;
     var current     = null;
     var timeOutFn   = null;
     var faderStat   = true;
     var mOver       = false;
     var items       = $("#" + element[0].id + "Content ." + element[0].id + "Image");
     var itemsSpan   = $("#" + element[0].id + "Content ." + element[0].id + "Image span");
    
     items.each(function(i) {
    
         $(items[i]).mouseover(function() {
            mOver = true;
         });
    
         $(items[i]).mouseout(function() {
             mOver   = false;
             fadeElement(true);
         });
    
     });
    
     var fadeElement = function(isMouseOut) {
         var thisTimeOut = (isMouseOut) ? (timeOut/2) : timeOut;
         thisTimeOut = (faderStat) ? 10 : thisTimeOut;
         if(items.length > 0) {
             timeOutFn = setTimeout(makeSlider, thisTimeOut);
         } else {
             console.log("Poof..");
         }
     }
    
     var makeSlider = function() {
         current = (current != null) ? current : items[(items.length-1)];
         var currNo      = jQuery.inArray(current, items) + 1
         currNo = (currNo == items.length) ? 0 : (currNo - 1);
         var newMargin   = $(element).width() * currNo;
         if(faderStat == true) {
             if(!mOver) {
                 $(items[currNo]).fadeIn((timeOut/6), function() {
                     if($(itemsSpan[currNo]).css('bottom') == 0) {
                         $(itemsSpan[currNo]).slideUp((timeOut/6), function() {
                             faderStat = false;
                             current = items[currNo];
                             if(!mOver) {
                                 fadeElement(false);
                             }
                         });
                     } else {
                         $(itemsSpan[currNo]).slideDown((timeOut/6), function() {
                             faderStat = false;
                             current = items[currNo];
                             if(!mOver) {
                                 fadeElement(false);
                             }
                         });
                     }
                 });
             }
         } else {
             if(!mOver) {
                 if($(itemsSpan[currNo]).css('bottom') == 0) {
                     $(itemsSpan[currNo]).slideDown((timeOut/6), function() {
                         $(items[currNo]).fadeOut((timeOut/6), function() {
                             faderStat = true;
                             current = items[(currNo+1)];
                             if(!mOver) {
                                 fadeElement(false);
                             }
                         });
                     });
                 } else {
                     $(itemsSpan[currNo]).slideUp((timeOut/6), function() {
                     $(items[currNo]).fadeOut((timeOut/6), function() {
                             faderStat = true;
                             current = items[(currNo+1)];
                             if(!mOver) {
                                 fadeElement(false);
                             }
                         });
                     });
                 }
             }
         }
     }
    
     makeSlider();
    
    };
    
    })(jQuery);
    
    //]]>
    </script>
    <script type='text/javascript'>
    $(document).ready(function() {
    $('#s3slider').s3Slider({
    timeOut: 4000
    });
    });
    </script>
    <style type='text/css'>
    #s3slider {
    background:#000000;
    border:1px solid #818e8f;
    width: 550px;
    height: 200px;
    position: relative;
    overflow: hidden;
    }
    #s3sliderContent {
    width: 550px;
    position: absolute;
    top:0px;
    padding: 0px;
    margin: 0px;
    }
    .s3sliderImage {
    float: left;
    position: relative;
    display: none;
    }
    .s3sliderImage span {
    position: absolute;
    left: 0;
    font: 20px Trebuchet MS, sans-serif;
    padding: 10px 0px;
    width: 550px;
    background-color: #000;
    filter: alpha(opacity=80);
    -moz-opacity: 0.8;
    -khtml-opacity: 0.8;
    opacity: 0.8;
    color: #fff;
    display: none;
    bottom: 0;
    text-align:center;
    }
    .clear {
    clear: both;
    }
    </style


    NOTE : To change the speed of slideshow, change the value 4000.
    4.Save your template.
    5.Now go to Layout-->Page Element and click on "Add a gadget".
    6.Select "html/java script" and add the code given below and click save.

    <div id="s3slider">
    <ul id="s3sliderContent">
    
    <li class="s3sliderImage"><a href="YOUR-LINK-HERE"><img style="width:550px;height:200px;" src="https://blogger.googleusercontent.com/img/b/R29vZ2xl/AVvXsEhretS-iX6taBb0WzfyWicFlLCKyINKjAUbHf2kLYDcpVIoNf7KC6_QpC6e-rY0R8u1chmNOeqPKSIIm6iDwmrSdzPuOTHfzDWPzS8o-ftJ1gE4VKbK7xiJNSyZggjEfSLQk5TxGp2g_LNg/s1600/Crysis-11.jpg" /><span>Crysis : Download Full Version</span></a></li>
    
    <li class="s3sliderImage"><a href="YOUR-LINK-HERE"><img style="width:550px;height:200px;" src="https://blogger.googleusercontent.com/img/b/R29vZ2xl/AVvXsEgYQpke8II2hqxTZSFWJivvAC39u6TcTI85FpjmYBEgw06dqzzJHEt5djwNnjT9Asy0Idw3VqaOfmv1qQn8sTCKkKvUSlWcxwH852iCBZtY_JpxziAgcQLWdQmyIhfx1NFHzz4Z6SgjkE8g//" /><span>Halo 3 : Play Game Online</span></a></li>
    
    <li class="s3sliderImage"><a href="YOUR-LINK-HERE"><img style="width:550px;height:200px;" src="https://blogger.googleusercontent.com/img/b/R29vZ2xl/AVvXsEjEv_1lDz_HrMUHD8TvCHt-vovCcIPkGtfR6_dFU448UHOKECWA0WfWAnMZ9hj3xPcIv_f_sei59Psp7ZlpuFW-IQZtTYMEe8ZGW3zTGZKuN01x2blxGSPqWLcONdhEQ2WcG3LwRpTFGNdH//" /><span>Avatar : Watch Movie Now !!!</span></a></li>
    
    <li class="s3sliderImage"><a href="YOUR-LINK-HERE"><img style="width:550px;height:200px;" src="https://blogger.googleusercontent.com/img/b/R29vZ2xl/AVvXsEihqtDyoHSHmy1JIgdhiFheOx641pfrnOO369FhI6IvwCpkna5ussnZVpK_-jymiiMAgP-wCPF-bZD-uknoOndaj-a390-toLy8CyR8WnorA0LYECs9J54ylkE6LK5_9LMdnnK5UUVfmDWo/s1600/call+of+duty-11.jpg" /><span>Call Of Duty 4 : Get Here</span></a></li>
    
    <li class="s3sliderImage"></li>
    </ul>
    </div>
    
    <div class='clear'></div>


    NOTE : Replace YOUR-LINK-HERE and images with your content.
    Now you have successfully installed this slide show to your site.


    Read More...

    30 Mar 2013

    New version of recommended for you post slide out widget with social share buttons

    1 comment
    New version of recommended post slide out widget with social share buttons, Blogging Section

    Recommended post slide out widget always helps your blog visitors to keep surfing different posts on your blog without leaving your blog, new version of recommended slide out post widget with social share buttons and more customization option, in this widget i have included facebook like button, twitter share button and google+ button, and also give option to change position of the widget,in old version widget it was fixed at right side of your page corner, but in this widget you can freely set position of the widget as you want to show left or right ! and also give option to change color of top border as matching with your blog/site and  more..


    How To Install this Gadget?

    End Of Post marker – The slide comes out when the user scrolls down to a particular point in your Blog.(the bottom of the page by default) To mark this point, you can add an HTML element there. The element should have the id bpslidein_place_holder
    e.g.: <div id=’bpslidein_place_holder’></div> would do the job. The best place to add this marker would be at the end of the post. If you want to do it easily, you can add this to your Blogger Template.
    In your template Find,(You will have to expand the Widget Templates)

    <data:post.body/>
    Immediately below it, add the following snippet and save your template
    <b:if cond='data:blog.pageType == "item"'> 
    
    Now when the reader scrolls down to this div, the slide will open up.

    To Add Gadget to Your Blog...

    1. Go To LAYOUT.
    2. Click on Add Gadget below Blog Post.
    3. Select Third party html Gadget.
    4. Copy The Below code in it.
    5. Now Click Save & You are Done!
    <style>
    #bpslidein{z index:5;
    width:400px;
    height:100px;
    padding:10px;
    background-color:#fff;
    border-top:5px solid #F9780E;
    position:fixed;
    right:-430px;
    bottom:0;-moz-box-shadow:-5px 0 10px #aaa;
    -webkit-box-shadow:-5px 0 10px #aaa;
    box-shadow:-5px 0 10px #aaa;
    font-family:Arial, Helvetica, sans-serif;
    }
    #bpslidein p{
    font-size:11px;
    text-transform:uppercase;
    font-family:Arial,Helvetica,sans-serif;
    letter-spacing:1px;color:#555;
    }
    #bpslidein_title{
    color:#555;
    font-weight:700;
    font-size:16px;
    margin:10px 20px 10px 0;
    }
    #bpslidein a,#bpslidein a:hover,#bpslidein_title{
    text-decoration:none;color:#F9780E;
    }
    #bpslidein .close,#bpslidein .expand,#bpslidein .help{
    border:2px solid #EEE;
    cursor:pointer;
    color:#9A9AA1;
    width:13px;
    height:15px;
    padding:2px 0 0 5px;
    position:absolute;
    right:10px;font-size:17px;
    font-weight:700;font-family:Arial, Helvetica, sans-serif;
    font-size:12px;
    }
    #bpslidein .help{right:35px;
    }
    #bpslidein_title,#bpslidein_image{
    float:left;width:80px;
    }
    #bpslidein_title{
    width:290px;
    }
    
    Recommended Post Slide Out For Blogger
    Read More...

    29 Mar 2013

    Stylish Social Media Widget with Search Box

    Leave a Comment
    Stylish Social Media Widget with Search Box, Blogging Section
    In this  post  im gonna  explain  how to add social media  widget with light search box for your blog. So, this include two gadget.  social profiles  icons and search box. Im using css3 and HTML for this widget. you can take a look at in demo page.

                                      Demo
     Demo By BloggingSection


    Steps To Be Follow

    1. Log in to blogger account and Click drop down.

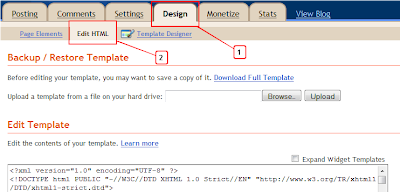
    2. Now select "Layout" Like Below.

    3. Click Add Gadget and select 'HTML/Javascript

    4. Paste below one of below code.

    <style>
    #btrixwidget{width:307px;
    padding:0 0 5px 0;
    border:1px solid black;}
    
    #btrix-searchbox {
        border-radius: 5px;
        background: URL(https://blogger.googleusercontent.com/img/b/R29vZ2xl/AVvXsEgOwbde2hIRzsApfJYdVC8utE6AIg0_SETRgz293_E85XQKqDnEY2bn91_M44-ILlO1bg4EcEPNgz8WP0-bau-PNLr9RAh2lmUMx8oppkYwx1B8avPAp11WLqGX_kUehxVE2U1OgEvkiKXH/s1600/blue.png) no-repeat scroll center center transparent;
        width: 307px;
        height: 50px;
        disaply: block;
    }
      
    form#btrix-searchform {
        display: block;
        padding: 9px 16px;
        margin: 0;
    }
      
    form#btrix-searchform #s {
        padding-left: 24px !important;
        padding: 7.5px;
        margin: 0;
        width: 198px;
        font-size: 16px;
        font-family: georgia;
        font-style: italic;
        color: #666666;
        vertical-align: top;
        border: none;
        background: transparent;
    }
      
    form#btrix-searchform
    #sbutton {
        margin: 0;
        padding: 0;
        height: 40px;
        width: 74px;
        vertical-align: top;
        border: none;
        background: transparent;
    }
    </style>
    
    <div id="btrixwidget"><center>
    <a href="http://twitter.com/MrOmkarSingh" target="_blank" wrc_done="true"><img src="https://blogger.googleusercontent.com/img/b/R29vZ2xl/AVvXsEh0hOqWqpN3kVjiBHyeiDKSyc5xKS9ptzfDxxzeFQPPeiWQhLnauBAG08XujDjrVjfSGRydsvrvDb32J6HuTyKchVCM4Kqqg9XC1rWJzxApMKf-aIB55_czv3rArMQIDKsy57qVK7dUbM0/s1600/btrix-twitter.png" alt="" title="twitter" width="62" height="78" class="alignnone size-full wp-image-6249"></a>
    
    <a href="http://www.facebook.com/bloggingSection" target="_blank" wrc_done="true"><img src="https://blogger.googleusercontent.com/img/b/R29vZ2xl/AVvXsEh27x6p4biK0JQj2TZh5Nxe99temztk1s7JHR8FGEgoxRWC9Vd3Ywubt9kfKKYjXlC9wCAaUrMFMtVO2KKc3gW0ouEh_ZlsbuKGXERr52MPbftOoqGhsaox4W_24vqgD3AgvnqWz9VbAgY/s1600/btrix-facebook.png" alt="" title="facebook" width="62" height="78" class="alignnone size-full wp-image-6248"></a>
    
    <a href="http://feeds.feedburner.com/bloggingSection" target="_blank" wrc_done="true"><img src="https://blogger.googleusercontent.com/img/b/R29vZ2xl/AVvXsEhDQYbsr90i9a2hvNbXrn5kZGlXmtlNZR04_xJQh39iMxM0XxWrSLzIw3m_C2Yx5EQtYDN8R8ykRMjpT92qQhK5pV5lGsNNaivj6Hv7aG2DW04U8drBKZcQvEfrFsNbMqp9GDCPKP2bx70/s1600/btrix-rss.png" alt="" title="rss" width="62" height="78" class="alignnone size-full wp-image-6251"></a>
    
    <a href="http://au.linkedin.com/username" target="_blank" wrc_done="true"><img src="https://blogger.googleusercontent.com/img/b/R29vZ2xl/AVvXsEiiPv_fJbJpfJ-z26GDzvMe_Zfv5Ahh8594y1sY651P7mkN37hcFKTWozKx9JC-zBP-o_8ZvHf7oG1ljUITTgaxz-ZcFOddQ-eOs3HRZoKS_TZnVVfMisI5nuiThz1SrruJwdhxe9v-N2g/s1600/btrix-linkedin.png" alt="" title="linkedin" width="62" height="78" class="alignnone size-full wp-image-6250"></a>
    
    <div id="btrix-searchbox">
        <form id="btrix-searchform" action="/search" method="get">
            <input type="text" id="s" name="q" value="Search..." onfocus='if (this.value == "Search...") {this.value = ""}'
            onblur='if (this.value == "") {this.value = "Search...";}' />
            <input type="image" src="http://img1.blogblog.com/img/blank.gif" id="sbutton"
            />
        </form>
    </div>
    </center>
    </div>

    Replace MrOmkarSingh with your twitter profile 
    Replace BloggingSection with your facebook profile 
    Replace BloggingSection with your feedburner profile 
    Replace Username with your linkedin profile 


    7. Now save your HTML/Javascript'.

        You are done...
    Read More...

    28 Mar 2013

    New Mashable AJAX Navigation Menu Widget for Blogger

    Leave a Comment
    New Mashable AJAX Navigation Menu Widget for Blogger, Blogging Section
    AJAX Navigation menu for blogger is very new widget created by Me in Blogger platform that uses Blogger JSON feed API and AJAX. This navigation menu is inspired from Mashable.com old site. I coded this widget some months ago, but there is no time for publishing this article. And now i recoded and improved this widget and added customizable features.


    How It Works?

    this widget is works based on jQuery library and Blogger JSON feed API. Your blog must be for Public visitors. other wise the Blogger JSON Feed API won’t works.
    The menu is works just like normal drop-down menu when javascript is disabled, And it will turns to AJAX powered drop-down menu when javascript is enabled.
    New Mashable AJAX Navigation Menu Widget for Blogger, Blogging Section 2

    This Demo is Provided by Way2Blogging.


    How To Install this Gadget?

    1. Go to Blogger Dashboard > Select the Blog > Go to Template page of the Blog
    2. Click Edit HTML button

    The CSS

    Add the Following CSS Code before ]]></b:skin>

    /* Menu Stylings */
    .w2bmenu *{margin: 0;padding: 0;}
    ul.w2bmenu {list-style: none;line-height: 1;overflow: visible !important;}
    ul.w2bmenu:after{margin: 0;padding: 0;content: ' ';display: block;height: 0px;clear: both;}
    ul.w2bmenu li{list-style: none;position:relative;float: left;margin: 0 !important;padding: 0 !important;}
    ul.w2bmenu li a{margin: 0;padding: 12px 16px !important;font-family: 'Helvetica Neue', Arial, Helvetica, sans-serif !important;color: #6b6b6b !important;text-shadow: 0 1px 0 #fff;font-weight: 700 !important;text-transform: uppercase !important;font-size: 12px !important;display: block !important;border: 0 none !important;}
    ul.w2bmenu li a:hover,ul.w2bmenu li a.hoverover{background: #f5f5f5 !important;}
    ul.w2bmenu ul{position: absolute;display: none;top: 100%;border:1px solid #ccc;}
    ul.w2bmenu li:hover > ul{display: block;}
    ul.w2bmenu ul li{float: none;min-width: 160px;background:#f5f5f5;text-shadow: none;}
    ul.w2bmenu ul li a{padding: 12px 14px;text-transform: none;font-weight: normal;}
    ul.w2bmenu ul li a:hover,ul.w2bajaxmenu ul li a.hoverover{background: #fff !important;}
    ul.w2bmenu ul ul{display: none;left: 100%;top: 0;}
    /* AJAX Menu Stylings */
    ul.w2bajaxmenu li div.submenu {display: none;position: absolute;width: 600px;z-index: 90;left: -1px;top: 100%;overflow: hidden;min-height: 150px;background: #fff;border:1px solid #cccccc;border-top: 0 none;}
    ul.w2bajaxmenu li:hover div.submenu {display: block;}
    ul.w2bajaxmenu ul ,ul.w2bajaxmenu ul li{display: block !important;border: 0 none !important;margin: 0 !important;padding:0 !important;}
    ul.w2bajaxmenu ul li{background: none !important;float: none !important;}
    ul.w2bajaxmenu ul.verticlemenu{position: absolute;width: 33%;left:0;top:0;bottom: 0;background: #f5f5f5;}
    ul.w2bajaxmenu ul.postslist {position: relative;display: block;width:65%;float: right;margin: 8px 0 !important;background: none;}
    ul.w2bajaxmenu ul.postslist li{display: block;overflow: hidden;border-bottom: 1px #eee solid;position: relative;min-height: 60px;padding: 8px 8px 8px 110px !important;}
    ul.w2bajaxmenu ul.postslist li:last-child{border-bottom: none 0;}
    ul.w2bajaxmenu ul.postslist li .imgCont{position: absolute;left: 0;top:8px;width: 100px;height: 60px;overflow: hidden;border:1px solid #dcdcdc;font-size: 0;line-height: 0;}
    ul.w2bajaxmenu ul.postslist li .imgCont img{position: relative;top:-20px;padding: 0;width: 100px;height: 100px;display: block;}
    ul.w2bajaxmenu ul.postslist li a{display: block;line-height: 1.4;padding: 0 !important;}
    ul.w2bajaxmenu .loader{background:url('http://i.imgur.com/SeivG.gif') no-repeat scroll 0 0 transparent;width:22px;height:22px;position: absolute;top:50%;margin-top: -11px;right:5px;}
    ul.w2bajaxmenu .menuArrow {border-bottom: 4px solid transparent;border-top: 4px solid transparent;border-left: 4px solid #999999;display: block;height: 0;margin-top: -4px;position: absolute;right: 11px;top: 50%;width: 0;}
    #w2bajaxmenu {background: #ededed;background: -moz-linear-gradient(top, #ededed 0%, #e0e0e0 100%);background: -webkit-gradient(linear, left top, left bottom, color-stop(0%,#ededed), color-stop(100%,#e0e0e0));background: -webkit-linear-gradient(top, #ededed 0%,#e0e0e0 100%);background: -o-linear-gradient(top, #ededed 0%,#e0e0e0 100%);background: -ms-linear-gradient(top, #ededed 0%,#e0e0e0 100%);background: linear-gradient(to bottom, #ededed 0%,#e0e0e0 100%);filter: progid:DXImageTransform.Microsoft.gradient( startColorstr='#ededed', endColorstr='#e0e0e0',GradientType=0 );border: 1px solid #cccccc;}


    The JAVAScript

    If your Blog has jQuery plugin, then don’t add this plugin in your blog template,

    Otherwise add the below line of code before  </head> tag

    <script type="text/javascript" src="http://ajax.googleapis.com/ajax/libs/jquery/1.8.2/jquery.min.js"></script>

    Add the following Javascript code before  </head> tag

    <script type="text/javascript" src="http://widgets.way2blogging.org/blogger-widgets/ajaxbloggermenu.min.js"></script> <script type="text/javascript"> jQuery(document).ready(function($) { $('#w2bajaxmenu').ajaxBloggerMenu({ numPosts : 4, // Number of Posts to show defaultImg : 'http://url-to-image.com/default-image.jpeg' // Default thumbnail Image }); }); </script>


    The HTML

    In this section you should be carefully add the HTML, otherwise it won’t works.
    The AJAX Menu accepts three types of urls. You must use this urls only in the menu. They are Label,Search Query and Label w/ Search Query.
    Label URLhttp://yourblogdomain.blogspot.com/search/label/LABELNAME
    Search Queryhttp://yourblogdomain.blogspot.com/search?q=SEARCHQUERY
    Label w/ Search Queryhttp://yourblogdomain.blogspot.com/search/label/LABELNAME?q=SEARCHQUERY
    Note:- Search Query must be Url encoded. You can use this tool to encode your search query.
    Use this MENU Example code and add it in HTML/JavaScript gadget

    <ul id="w2bajaxmenu" class="w2bmenu"> <li> <a href="#">Home</a> </li> <li> <a href="#">Example 1</a> <ul> <li><a href="http://yourblogdomain.blogspot.com/search/label/AdSense">Sample Label</a></li> <li><a href="http://yourblogdomain.blogspot.com/search/label/Gadgets?q=harish">Label w/ Search</a></li> <li><a href="http://yourblogdomain.blogspot.com/search?q=way2blogging">Search Query</a></li> <li><a href="http://yourblogdomain.blogspot.com/search?q=This+is+long+query+you+do+not+get+any+results,+so+try+others">Unknown Search</a> </ul> </li> <li> <a href="#">Example 2</a> <ul> <li><a href="http://yourblogdomain.blogspot.com/search/label/Design">Design</a></li> <li><a href="http://yourblogdomain.blogspot.com/search/label/Facebook?q=Like+Button">Facebook</a></li> <li><a href="http://yourblogdomain.blogspot.com/search/label/Templates">Templates</a></li> <li><a href="http://yourblogdomain.blogspot.com/search?q=Guest+Posts">Guest Posts</a></li> </ul> </li> <li><a href="http://yourblogdomain.blogspot.com">Normal Link</a></li> </ul>

    At Last....

    I hope you enjoyed with this widget. I am really sorry for not posting new gadgets and templates regularly. I hope i will continue release new templates, widgets and tips. :)
    Suggest new features, your feedback and your thoughts on this widget by leaving a comment and don’t forget to share this widget.
    Read More...

    ShareThis

    If You Like This Post Then Please Take 5 Second To Share It!
    Twitter Bird Gadget