Guest Post - Our host is Salman Farooqui, who takes a look at image compression and the best tools to help.See How To Become a guest author on Blogging Section.

Image files today are the most used media type to share. However, they are often too large in size to easily share or store. This is where image compression comes to play. Image compression is technique which reduces the image size without significant reduction in image quality. Many people fear image compression because they have a misunderstanding that it is a threat to image quality. Actually, image compression is of two type - Lossless and Lossy.
So what are the benefits of image compression in blogging? Well, image compression technique is best suited for blogging. Compressed images not only reduces page's loading time it also takes less space on your hosting space and bandwidth. This is one of the best and most promising method to reduce page response time by optimizing images of your blog. It proves a boon for users who have slow Internet connectivity. They don't have to wait for long for viewing your blog.
Faster page loading impacts your blog's visitor bounce rate. No one wants to wait for site to load up. If it takes a lot of time people will close your site and probably won't come back. This happens with many new bloggers, they add high quality large size images as their background and on their blog. If you can easily reduce the size of the image then why load those big ones.
Optimizing your images is a must thing to do for better site speed so that users have a better experience on your site. There are many free and useful tools for optimizing images without losing any visible image quality. We will go through some of the best tools to optimize and compress your images before adding it your blog.
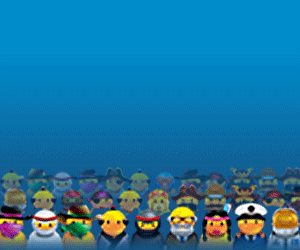
Original Image :

Compressed Image :

First image is 70kb and second is an optimized image with size of just 9kb. However, different image formats have different potential for reduction in size.
Photoshop
Photoshop is the first name that comes to our mind when we want some image editing or optimization. When you save an image, use 'save for web' option rather than 'save as' option in photoshop. You will see a significant change in image size without compromising with your image quality. There is another cool photoshop plugin called SuperPNG. It's a free Photoshop plugin for optimizing small PNG images.
Irfan View
Irfan View is another very popular image viewing and editing tool. Apart from a lot of great inbuilt features, you can use plugins to enhance the features. One such plugin is RIOT (Radical Image Optimization Tool). This plugin creates a save for web option in irfan view menu. You can simply scroll the slider for optimized image size and you will preview the image quality for that size. It is a great tool if you want your image corresponding to a fixed image size.
PNGOUT :

It is useful to optimize pictures created by other tools. The new image is lossless meaning that the new image will be of same quality but with lower image size. It can operate from Windows run dialog box and also command prompt.
OPTIPNG :
It can convert different image to png and can easily optimize png images losslessly. An open source advanced png optimization tool recompresses optimized images further to even more smaller size without any loss in image quality.
PNGCRUSH :
Another great tool for lossless png compression. It tries different methods of compression according to your image attributes and gives you best result. Changes color type, like truecolor to indexed color if the colors are very few which reduces the image size but not the quality.
JPEGTRAN :
A nice tool for optimizing jpeg files. It supports lossless compression between different jpeg files. Another great feature of this tool is that it supports lossless rotation and cropping of images.
GIFSICLE :
Program for optimizing and manipulation, editing and deconstruction gif animation image files. Creating gif animations with GIFSICLE is very easy. It runs on command-line to create and edit gif images.

Drop your comments and questions below.
 Salman Farooqui
Image files today are the most used media type to share. However, they are often too large in size to easily share or store. This is where image compression comes to play. Image compression is technique which reduces the image size without significant reduction in image quality. Many people fear image compression because they have a misunderstanding that it is a threat to image quality. Actually, image compression is of two type - Lossless and Lossy.
Lossless image compression
Lossless image compression involves removal of some of the image data to reduce the size but the image quality remains the same and all the image details are preserved. You won't notice any change in image but the images through this method can only be compressed to around half in size.Lossy image compression
Lossy image compression can reduce the image size to more than one tenth of it's size but the quality, though not very significant, is reduced. Lossy method will reduce some shades of color that are very similar thus reducing the overall size of the image.So what are the benefits of image compression in blogging? Well, image compression technique is best suited for blogging. Compressed images not only reduces page's loading time it also takes less space on your hosting space and bandwidth. This is one of the best and most promising method to reduce page response time by optimizing images of your blog. It proves a boon for users who have slow Internet connectivity. They don't have to wait for long for viewing your blog.
Importance Of Page Load Time
Your blog loading time is now part of google algorithm which how decides how to rank a site in google search results. You don't want your blog to be devoid of many benefit, Do you?Faster page loading impacts your blog's visitor bounce rate. No one wants to wait for site to load up. If it takes a lot of time people will close your site and probably won't come back. This happens with many new bloggers, they add high quality large size images as their background and on their blog. If you can easily reduce the size of the image then why load those big ones.
Optimizing your images is a must thing to do for better site speed so that users have a better experience on your site. There are many free and useful tools for optimizing images without losing any visible image quality. We will go through some of the best tools to optimize and compress your images before adding it your blog.
Original Image :
Compressed Image :
First image is 70kb and second is an optimized image with size of just 9kb. However, different image formats have different potential for reduction in size.
Offline Tools
Photoshop
Photoshop is the first name that comes to our mind when we want some image editing or optimization. When you save an image, use 'save for web' option rather than 'save as' option in photoshop. You will see a significant change in image size without compromising with your image quality. There is another cool photoshop plugin called SuperPNG. It's a free Photoshop plugin for optimizing small PNG images.
Irfan View
Irfan View is another very popular image viewing and editing tool. Apart from a lot of great inbuilt features, you can use plugins to enhance the features. One such plugin is RIOT (Radical Image Optimization Tool). This plugin creates a save for web option in irfan view menu. You can simply scroll the slider for optimized image size and you will preview the image quality for that size. It is a great tool if you want your image corresponding to a fixed image size.
PNGOUT :
It is useful to optimize pictures created by other tools. The new image is lossless meaning that the new image will be of same quality but with lower image size. It can operate from Windows run dialog box and also command prompt.
OPTIPNG :
It can convert different image to png and can easily optimize png images losslessly. An open source advanced png optimization tool recompresses optimized images further to even more smaller size without any loss in image quality.
PNGCRUSH :
Another great tool for lossless png compression. It tries different methods of compression according to your image attributes and gives you best result. Changes color type, like truecolor to indexed color if the colors are very few which reduces the image size but not the quality.
JPEGTRAN :
A nice tool for optimizing jpeg files. It supports lossless compression between different jpeg files. Another great feature of this tool is that it supports lossless rotation and cropping of images.
GIFSICLE :
Program for optimizing and manipulation, editing and deconstruction gif animation image files. Creating gif animations with GIFSICLE is very easy. It runs on command-line to create and edit gif images.
Online Tools
SmushIT :
One of the most reliable and popular online tool by Yahoo Network for lossless compression of images. It shows you the new optimized image size before compressing.
JPEG Optimizer :
Useful for optimizing digital pictures. Select a compression value from 0 to 99 and click optimize photo to get your result. You can also resize your picture by selecting the appropriate size.
Another great tool for image optimizaion. Just visit the site, browse
your file, set the quality and get the new optimized image file. A piece
of cake.
Picresize :
This is basically a picture resizer tool but you can use it's picture size reduction option. Enter the desired size of the image and press OK.Let's say you have an image of 200KB and you want to change it to 50KB, picresize will do it for you in just a click of button.
Lossless
png image optimization with full support for transparency. You can drag
and drop up to 20 images on tinypng site to get your compressed
images. This is basically a picture resizer tool but you can use it's picture size reduction option. Enter the desired size of the image and press OK.Let's say you have an image of 200KB and you want to change it to 50KB, picresize will do it for you in just a click of button.
Drop your comments and questions below.
Salman Farooqui
About the Guest Author:
Salman Farooqui designs blogger templates and writes articles related to blogger, design hacks and SEO. His blog Kick Blogger publishes free blogger templates.
Salman Farooqui designs blogger templates and writes articles related to blogger, design hacks and SEO. His blog Kick Blogger publishes free blogger templates.